Tampilkan postingan dengan label how. Tampilkan semua postingan

HOW TO DEMOLISH A DRESSER WITH A VEHICLE poor george

Kamis, 19 Mei 2016


Most of my current project are all still in some unfinished state but I do want to share with you
what happened earlier today.
 
Cue the photographic evidence ...
 
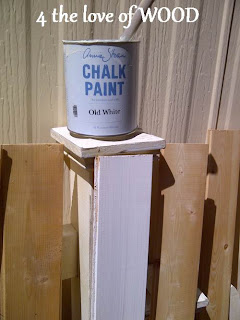
thats what you get MDF
 
While backing out of the driveway some ones tire caught the edge of this
dresser and demolished it in a split second. I had just got out of the shower and was in a bathrobe when I heard the commotion. As Im flying out the door to find out what has happened I hear a familiar voice calling my name.
 
 
In Georges defence we had so many other furniture pieces to move yesterday
and quite a few other things to deal with I forgot to get the dresser moved off the driveway. 
 
Most ppl who have met George know how wonderfully friendly and kind he is.
Here are a few more facts about George ...
 
- Hes college educated with a bachelors degree
and originally from New Brunswick (east coast) where he worked for NB Power for 23 years
- Hes coached hockey most of his adult life and took teams on tour to Europe
- Early in his teens the NHL were scouting him but he liked playing in a band more.
- He lost his father in a plane crash over 30 years ago.
- Hes been a director on 2 non profit boards here in Vancouver
- He donates to charity every chance he gets and especially at Christmas
- He was a business man wearing a suit most days before I met him.
- He had never been to a yard sale before me and now he brings home roadside treasures.
 
 
3 of the furniture pieces he was helping me move yesterday were these large dressers
I was painting for a local extreme makeover.
 
 
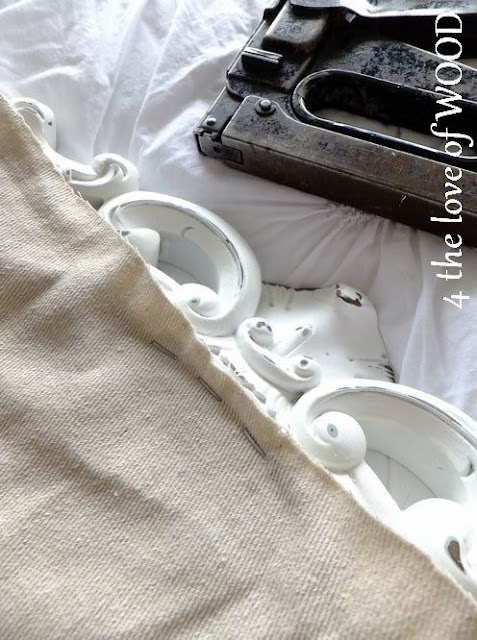
I also had a couple of photon shoots to get through including this vintage country display cabinet,
 
 
and this outdoor bedroom scene.
 
 
The weather has been amazing and hot so Im spreading out and have projects all over
which is taking away from my time to write about each of them for you.
The photos are all being taken and Ill be able to
show you the ins and outs of most of them when the weather turns.
 
As for the the dresser ...
 
 
I have less demolishion to do and most importantly George is forgiven.


?
Read More..

WHITE WASHED BOARDS how to


Im late posting today because I was baby sitting the nephews this morning when I would
normally be writing and editing photos for you.
 
 
White washing boards is one of the easiest paint techniques to do.
 
All you need is:
 
raw wood boards (no finish on them)
watery paint (it should run like the photo below)
wide paint brush and a large rag
 
NOTE: any water based paint will work and you only need a small amount
 
 
Take your wide paint brush and quickly but completely cover one of your boards in your runny paint
 and immediatly wipe it off with your large rag. Repeat for all your boards and let stand to dry.
 
FYI ... You will get paint on you doing this! 
 
The photo below shows the difference from before and after.
You get to see all the knots and wood grain but you have white boards. When I am using them
for backer boards I do not put anything else on them. If you were to use them as wainscotting where
they would get more traffic and need cleaning you could simply wax them for protection.
 
 
Here is another photo showing you how they look in use.
In this first photo the boards in the bottom portion of the cabinet have been painted
solid white and the upper portion have only been white washed.
 
 
And finally this is how it all looks finished and decorated.
 
 
I love the look and I get to enjoy it every day because it is what I did in the
back of my desk hutch ...


Read More..

HOW TO UPHOLSTER AN OPEN CHAIR BACK STEP I

Selasa, 17 Mei 2016


Ive received many messages asking for this next tutorial, so no more need to pass by these chairs.
Im going to show you how to get the back of this style chair upholstered.
 
 
We are going to start at the point after all the stripping and frame is already refinished.
 
 
I use a hand held, arm powered stapler with 1/4" staples.
I do have an electric stapler but because of the safety feature
it will not work with the tight ledge of this chair.
 
Here is a close up of the frame profile.
You can even see where the old staples were.
 
Start by shooting 3 staple in the top edge to start securing your fabric.
 
Figure out the best angle for your stapler to be used with your chair.
 
Here is a close up of where the staples are actually going into the frame.
 
The next place to attach your fabric is directly opposite of your first three staples,
down on the bottom edge.
 
Then across from each other.
 
Hold your fabric taught each time you shoot every staple in.
 
Once you have your 4 points of contact, simply go around attaching your fabric
with staples ever inch, continue to pull the fabric taught.
 
Once you are finished stapling, trim your fabric to 1/2 inch excess, I use small scissors cause
they are easier to work with in close corners.
 
Tip and turn your chair so everything you are doing is comfortable for your hands.
Make sure to pick a good work surface, I use my bed every time.
 
This overhang of fabric will simply be folded in and hidden inside of STEP II
 
You can bounce a coin off the fabric like a drum if done well.
Step II Filler and Front Fabric:
http://blogspot.ca/2013/06/how-to-upholster-open-chair-back-step-ii.html
Read More..

HOW TO MAKE A FRENCH VANITY

Sabtu, 14 Mei 2016


The beginning of my week started with rolling an old art deco vanity on a dolly into my work room.
The plan was to take it apart and make a pair of nightstands. I even took some photos of different
angles to show you how I was going to do it, thus this sideways before photo.
 
 
I hummed and hawed for a while before committing to the deconstructions because I really liked
the pair of drawers in the middle. Its an unusual characteristic of these pieces.
 
I had the right size legs to make it tall enough to sit at and I could reused the
wood that was originally on the bottom to make new back legs, so I choose to save it.
Below, you can see the faded area where I stole the wood from to make the back leg.?
 
Shes been painted in a creamy white and soft pink. I have a very specific recipe for the pink if you
 want to use it. I started with a quarter can of ASCP Old White, a single drop of Emperors Silk, and
3 drops of Coco. ASCP are very strongly pigmented especially the red so be cautious.


Read More..

HOW TO CHANGE THE SHAPE OF A CABINET

Minggu, 08 Mei 2016


I think it was last fall when I first saw this mini cupboard, it was attached to an email asking
if I could give it a makeover. I was intrigued and let her know something could definitely be done
to update and beautify the piece.
 
Fast forward 3/4 of a year and the owner has changed plans and sold me the cabinet as is was.
 
 
I had a special set of legs put a side. Originally taken from a big broken down coffee table, the legs
 were gorgeous but the shape was a bit different. I got underneath the cabinet and checked
out how they would work, conclusion was they would attach well and create a great new style.
 
 
I installed 3 small trim pieces to the top edge making a crown and changing the cabinets shape.
 
 
 I added to this new style by removing the simple handles and replacing
them with vintage French Provincial ones.
 
The cabinet even came with a skeleton key, its not the original and
doesnt work perfectly but it adds to the overall glamour.
 
 
The drawers got antique drop pulls left over from an older project. When your hardware is super
 fancy you can paint it the same color as the furniture and it will still pop and look stunning!
 
 
This cabinet is loved again and fits perfectly in its new home.
 
************************
 
 
Read More..

HOW TO MEASURE YOUR HANDLES tutorial

Rabu, 27 April 2016

 
How to measure for replacement handles and mounting screws.
 
 
99% of the time you will be dealing with a measurement on the quarter ...
Meaning the measurement will be
3" - 3.25" - 3.5" - 3.75"
3 inches - 3 1/4 inches - 3 1/2 inches - 3 3/4 inches and so on
 
A quarter of an inch is easy to misread so double checking is always wise
and measuring with a tape from the 1 inch mark is best.
 
This handle above has a 4 inch center to center mounting.
 
 
Now to the screw length ...
 
If you have picked a simple flush mounted handle you simple measure the drawer or door thickness
and add a quarter inch.
 
Flush mounting means the handle sits flat on the surface like the ones shown below.?
 
If you pick a handle with a collar that goes part way into the drawer or door
 
 
you have to compensate for that length as seen below.
 
 
THINGS TO NOTE:
 
It is better to keep mounting screws with the furniture they came on than to remove them
and keep with the hardware because they already match the thickness of the wood.
 
Most hardware has the same thread pattern for mounting screws. Every so often
you will come across an antique piece with a smaller thread. These screws should be kept
with the hardware.
 
Your local home improvement store offers inexpensive mounting screws.
These are usually cutable to several different lengths.
I also offer a tutorial on How to fill hardware holes here
and a tutorial on installing your hardware here
You can find great hardware here, Etsy shop
Read More..