Tampilkan postingan dengan label tutorial. Tampilkan semua postingan

DARK WAX TUTORIAL

Jumat, 06 Mei 2016


The left side is unfinished chalk paint and the right side has been dark waxed.
This process can be scary but if you take the right steps its like magic.
Ive used Minwax natural (yellow bits) so you can see the wax better during the process.
 
When applying wax work in small areas.
Apply clear wax to your unfinished chalk paint.
I have used a large deck brush to push in and around the handle.
A brush works best with 3 dimensional details. You can use old paint brushes for this part.
 
Deck Brush found at Home Depot approx $10 good for large projects but does loose hairs often
This is the important step to understand ...
your clear wax is absorbing into your chalk paint preserving the color and protecting your paint.
It has created a base to which you can apply the dark wax and have it move around much easier.
 
 
Remove any excess clear wax and dont worry about buffing.
 
Wear a rubber glove when using dark wax
 
Now dig deep, count to 10, hyperventilate if you need to and slather on the dark wax.
 
 
Work the wax into the crevises and corners with your brush.
The dark wax is simulating dirt and wear accumulated over decades.
 
 
Here is the magic ...
 
Apply more clear wax and you will see the dark wax start to lift and move around.
Continue using your rag or towel to get the intensity you want.
The trick is the dark wax is sitting on top of the first layer of clear wax.
 
 
Use your brush again to smooth around details and start to buff.
 
 Check out what ended up happening to this cabinet here:
http://blogspot.ca/2013/01/royal-crest-cabinet.html
 
****************************
 
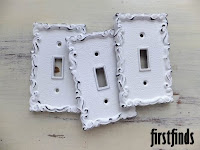
Stop in to see whats new in shabby chic white hardware available at firstfinds.
 
There are over 1000 pieces of used hardware to choose from
Etsy Shop.
 
 
Read More..

HOW TO MEASURE YOUR HANDLES tutorial

Rabu, 27 April 2016

 
How to measure for replacement handles and mounting screws.
 
 
99% of the time you will be dealing with a measurement on the quarter ...
Meaning the measurement will be
3" - 3.25" - 3.5" - 3.75"
3 inches - 3 1/4 inches - 3 1/2 inches - 3 3/4 inches and so on
 
A quarter of an inch is easy to misread so double checking is always wise
and measuring with a tape from the 1 inch mark is best.
 
This handle above has a 4 inch center to center mounting.
 
 
Now to the screw length ...
 
If you have picked a simple flush mounted handle you simple measure the drawer or door thickness
and add a quarter inch.
 
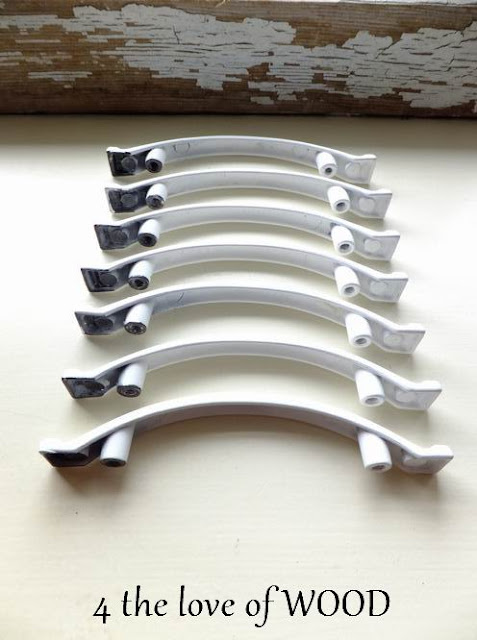
Flush mounting means the handle sits flat on the surface like the ones shown below.?
 
If you pick a handle with a collar that goes part way into the drawer or door
 
 
you have to compensate for that length as seen below.
 
 
THINGS TO NOTE:
 
It is better to keep mounting screws with the furniture they came on than to remove them
and keep with the hardware because they already match the thickness of the wood.
 
Most hardware has the same thread pattern for mounting screws. Every so often
you will come across an antique piece with a smaller thread. These screws should be kept
with the hardware.
 
Your local home improvement store offers inexpensive mounting screws.
These are usually cutable to several different lengths.
I also offer a tutorial on How to fill hardware holes here
and a tutorial on installing your hardware here
You can find great hardware here, Etsy shop
Read More..

OMG MY SCREWS ARE TOO SHORT tutorial

Senin, 18 April 2016

 
What do you do when you buy new hardware and come to find out
the mounting screws are too short?
 
 
You simply drill out a quarter inch inside the drawer to make the distance
the screw must travel shorter from front to back.
 
The easiest way to do this is with a spade bit (as seen above)
 
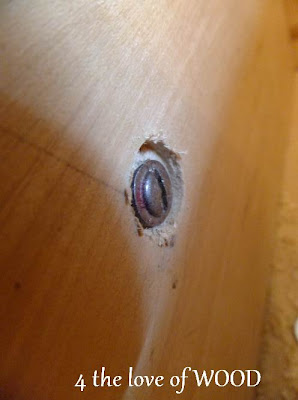
Here is the inside of the drawer before you start.
 
Take the spade bit and drill out just enough for your screw head to sit flush. 
 
Here you can see the results of your handy work.
Clean up the saw dust and burrs then screw your new hardware in place.
 
 
Spade bits are inexpensive and usually come in sets of a dozen different sizes.
They are handy to have close by when doing this kind of work.
Read More..

JOY JARS christmas tutorial

Sabtu, 16 April 2016


Ive nicknamed this project JOY JARS for the first set I ever saw
done by Miss Niamh of Kathleen Thomas Designs
 
 
This is a simple tutorial with big impact and continued use.
Its also another use for our ever loving Mason Jars we ALL collect.
 
Supplies:
 
Bath Salts - $8 Walmart 4kg
Metal Spray Paint
Tealite Candles
Adhesive Letters
Canning Jars w/lids
 
Start with getting your lids painted in the color of your choice.
Using a metal spray paint will ensure durability.
 
Fill the number of jars you need for your perfect word with your Epsom Salts.
Fill to the bottom of the threads.
 
 
Next adhere the letters to your jars.
Use the opposite side to any original lettering your jars already have. 
 
Add your tealite.
If put at the right level to the jars threads the flickering candle light will bounce off the rings.
 
 
After the holidays,
remove the candle, screw the lids on, and add them to your bathroom decor
with the original lettering facing out.
 
You now have the perfect excuse to take a nice long bath.
 
 
Read More..

THE ART OF WET DISTRESSING tutorial

Jumat, 18 Maret 2016

 
You dont have to use sand paper to give your furniture project a
distressed and worn look if you use Annie Sloan Chalk Paint.
 
 
This look can be achieved with a damp kitchen sponge.
 
Start by painting your project with your color choice of ASCP.
Once dry, grab a damp sponge and clean rag.
 
NOTE:
**2 sided sponge / scrubbies work best for this**
**just dampen your sponge do NOT have it dripping wet**
 
 
Working in small sections (like this leg) wipe your dried paint with the damp sponge.
The chalk paint is going to absorb the water and start to soften.
 
 
Now take the scrubby side and wiping over the same area.
Be gentle with this step, the softened areas will start to lift.
 
Take a rag and remove any excess paint haze and dry the area you just worked.
 
You are ready to wax now.
 
You can also take this opportunety to clean your floor.
 
Its really simple to do, no scrubbing, sanding, or dust,
you are letting the water do most of the work for you.
 
 *****************************************
 
 
Stop in to see whats new in shabby chic white hardware available at firstfinds.
 
There are over 1000 pieces of used hardware to choose from
Etsy Shop.


Read More..