Tampilkan postingan dengan label dark. Tampilkan semua postingan

DARK WAX TUTORIAL

Jumat, 06 Mei 2016


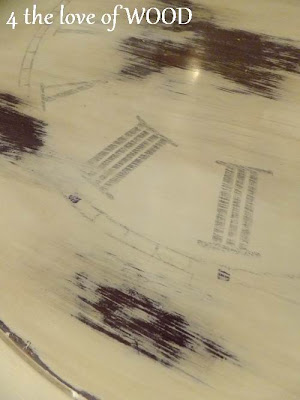
The left side is unfinished chalk paint and the right side has been dark waxed.
This process can be scary but if you take the right steps its like magic.
Ive used Minwax natural (yellow bits) so you can see the wax better during the process.
 
When applying wax work in small areas.
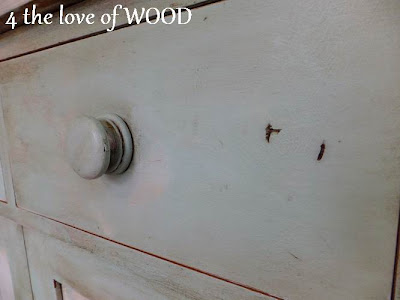
Apply clear wax to your unfinished chalk paint.
I have used a large deck brush to push in and around the handle.
A brush works best with 3 dimensional details. You can use old paint brushes for this part.
 
Deck Brush found at Home Depot approx $10 good for large projects but does loose hairs often
This is the important step to understand ...
your clear wax is absorbing into your chalk paint preserving the color and protecting your paint.
It has created a base to which you can apply the dark wax and have it move around much easier.
 
 
Remove any excess clear wax and dont worry about buffing.
 
Wear a rubber glove when using dark wax
 
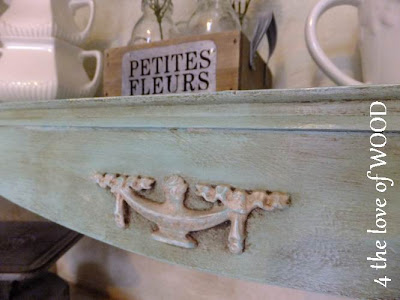
Now dig deep, count to 10, hyperventilate if you need to and slather on the dark wax.
 
 
Work the wax into the crevises and corners with your brush.
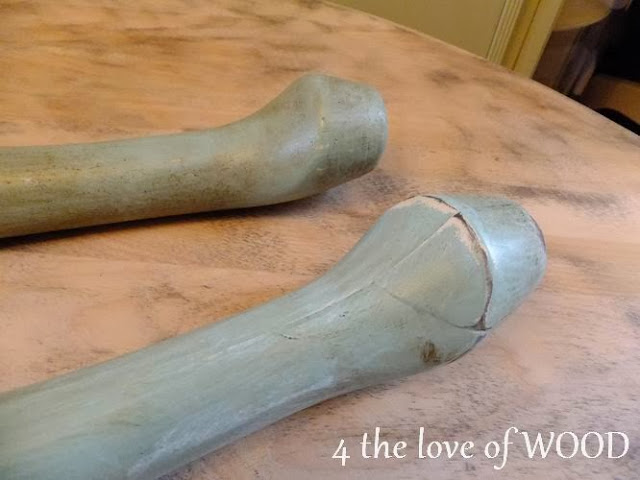
The dark wax is simulating dirt and wear accumulated over decades.
 
 
Here is the magic ...
 
Apply more clear wax and you will see the dark wax start to lift and move around.
Continue using your rag or towel to get the intensity you want.
The trick is the dark wax is sitting on top of the first layer of clear wax.
 
 
Use your brush again to smooth around details and start to buff.
 
 Check out what ended up happening to this cabinet here:
http://blogspot.ca/2013/01/royal-crest-cabinet.html
 
****************************
 
Stop in to see whats new in shabby chic white hardware available at firstfinds.
 
There are over 1000 pieces of used hardware to choose from
Etsy Shop.
 
 
Read More..

DARK WAXING A PAINTED DINING TABLE

Kamis, 21 April 2016


I have never had a dining room and the table we had when I was a child was in a corner just off the
kitchen. So I have never had a nice big dining table to decorate or invite friends and family to sit at.
 When you have never had something you arent quite sure you miss it or not but looking at all the
 wonderful and amazing dining rooms all over the internet and especially in blog land it is hard not to
 want one. Well no matter how good I am at juggling my projects and work spaces there will never be
room for a dining table here in the trailer.
 
 
I usually pass on dining tables cause of the space issues I have but this one came in the summer
when I thought I could get to it in the nice weather. I did start it then but didnt finish it till recently.
It is very much like my Tuscan Server I did last year
http://blogspot.ca/2012/11/the-benefits-of-dark-wax-tuscan-blue.html
 
 
It first starts with a white layer of chalk paint and then a second layer of soft turquoise blue. 


The left leg is painted in the blue and clear waxed.
The right leg has then been dark waxed.
 
Here the left leg has been dark waxed and sanded with 220 grit to expose the white and wood.
It also lightens the dark wax effect all the way down the leg.
 
 
The completed table is on display and available to purchase at BRICK & MORTAR LIVING
 
Read More..

THE BENEFITS OF DARK WAX tuscan blue server

Kamis, 10 Maret 2016


One of the main ingredients of the finish on this server is Annie Sloans Dark Wax.


My goal is to play with my paint finishes and colors a bit more than building.
Building is my ultimate favorite part of what I do but Ive been yearning to step out a little.
 
Im sharing so many close up shots of this finish so you can get the true idea of how
rustic and lovely it is.
 
Im here to tell you though it is hardwork and messy but I love it, and this
piece would be staying home if it was the right size for our little trailer.


sharing with:
 
?
Read More..

USING DARK WAX creme brule table

Jumat, 05 Februari 2016

 
How many of you have seen an amazing furniture finish that you fell in love with
and you find out the artist used dark wax technics to achieve the look. If you are a buyer than you
can purchase the piece and enjoy it in your home, showing it off to friends and family.
 
 
But if you are just starting to paint for yourself,
incorporating dark wax into your paint projects can seem tricky and a bit daunting.
Im not here to tell you that it isnt, I too struggled with using it but now know its
only because I was just as frightened to use it as the next person.
 
 
What I am going to suggest is ... try it! Dig in, get your hands dirty, and see what happens.
Many of us also have the oppurtunity to take local classes to help get us over the hurdle of starting.
There are so many wonderful tricks and technics that can be achieved with it.
Like what I have done with this new table, I have named Creme Brule.
 
With the Creme Brule Table I used the dark wax in different areas.
You can see in the center of the top I used it to lightly age the finish,
where as I used it heavier to change the color around the accents. 
 
 
And before I leave you George has
this weeks ETSY updates:
 
 
and a LOCAL OFFER:
For the next couple of weeks until Christmas, George would like to offer you the opportunity to order his candles and have them delivered by him personally through the week as *Thank You Gifts*, *Holiday House Warmings* and *Christmas Gifts*
Large Candles $15 local delivery included
Small Candles $13 local delivery included
Email georgegrandy@shaw.ca to start the process, custom color orders welcomed at no extra charge.
 
 
Read More..