


My collection of second hand ornate frames has been getting bigger lately
so this past weekend I started painted, photographing, and uploaded them on my
SHABBY CHIC ACCESSORIES page.
When Im photographing smaller things, NOT FURNITURE, I can have a lot more fun playing around with props and set ups.
These are some of the fun photos I took that didnt make the advertising page.
And all the props you see are things I have around me everyday in my own home.
Great examples of second hand finds.
 Read More..
I have no formal education in photography but my best tip for getting good pictures
is NATURAL LIGHT. Do not mistake that with direct sunlight.
The SHABBY CHIC ACCESSORIES page is getting a bit of a new look while Im
uploading the new frame photos ... stop in for a look see and let me know what you think
http://blogspot.ca/p/mirror-for-sale.html
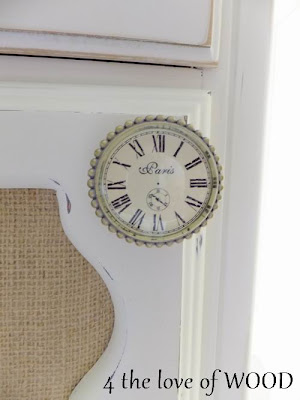
I TURNED SPIDERMAN SHABBY CHIC bathroom cabinet
Kamis, 12 Mei 2016
Id like to take a moment out of your day to impress upon you the extent of
damage there was on this piece of furniture.
What was I thinking?
better yet ...
What were they thinking?

Who doesnt love Spiderman?
Both sides of the cabinet looked like this.
Inside the drawer were clothing tags glued down.
You do realize the child that owned this could now be grown up and one of our premier designers!
Im betting not but you just never know.


See the writing and all the ink stains, some of it was three dimensional and glittery.
I do get distracted by shiny things, maybe it was the glitter pen that first attracted me,
or maybe for Halloween this year George should dress as Spiderman.


Eventually I got it cleaned up and repainted.


Thats when the transformation into something new and exciting really started.


I took an old kitchen cabinet door and cut it to fit the bottom opening.


Next I used some more kitchen doors to build into a tower.


I topped the tower with this wooden wall hook thingy that I picked up on one of our
THRIFT SHOP HOPS


For the back I used tongue and groove bead board bought at a yard sale.
Then the last few details were added ... 

A piece of ornate metal work from a trellis and some glass hardware for the
cupboard and drawer.


Read More..
She is now the most attractive bathroom storage cabinet in the land,
and will be on her way home within the next few days.
Cause someone has already claimed her.
I have a feeling I might have to do a few more of these storage towers.
Sharing with:
ECLECTIC SHABBY CHIC
Sabtu, 30 April 2016
I hope you like this new project as much as I do.
These provincial night stands have been traveling around our house for sometime.
I repaired them when I first purchased them, then they sat around getting moved from place to place.

I remember the day they got painted, but I had not found the doors I wanted to add to the bottom yet.
So they sat around a bit longer.
 |
| burlap panel adhered to insert |
Eventually I found the right doors and installed one to make sure they would work and look good.
Now I had to keep track of the other door, screws, and hinges until I felt like installing the other one.
Some more time went by and if I recall right I even painted the one with the door installed again (just the door part) and painted the door that was not installed yet.
As long as we are moving forward each time right? 


 Read More..
At this point I would like to stop and say this is not my typical motis operandi
but I am willing to admit on the rare occasion I am human.
Finally the second door was installed ....
and they sat around for a bit longer moving from room to room as I worked on
"more important projects?"
Well the day has finally come where all the final choices have been made, wax has been applied,
handles and knobs installed and photos taken.
 |
| Canadian made vintage handles purchased on Etsy |
Are they not just the most cutest eclectic shabby chic nightstand you have ever seen?
SHABBY CHIC PAINT LAYERING
Sabtu, 19 Maret 2016

I took an old record storage table and did a 2 color paint layering to get a fun shabby chic finish.


 Read More..
The original table was stained in a dark finish, that is the best possible base for really great looking
distressed pieces. The first color I applied on that was a soft spanish moss green, the second coat was
a bright white. Both paints were ASCP, but the green was a spur of the moment mix.

I find if you start to distress a layer paint project soon after drying the colors seem to come off together and too quickly with too much of the bottom layer not staying put, so I leave the paint to
really set up and dry for a few days so the first layer doesnt sand away as quickly.
Ive had several ppl who have tried the process talk to me about the same issues,
so it does seem to be a common issue.
Alternatively you could wax the first coat before applying the second color,
this would ensure it would hold better when sanding.
WARMING UP WHITE shabby chic coffee table
Senin, 22 Februari 2016

The weather today is rainy and curling up in a furry blanket would be wonderful,
but as every other day there is much to do. We delivered a large dresser into town last
night and had the honour of touring a large 1912 apartment in the midst of renovations.


That is one perk I never considered when I started up cycling furniture.
I have seen the inside of some wonderful homes around Vancouver, but when you started
to venture into the heart of downtown you get to see some magical history in the buildings.
Imagine the carved details of this love seat frame built into the walls and trim of a home.
?
Back in the country my latest endeavor is a provincial coffee table
with another wonderful french graphic.
I dont do too many coffee tables but my mother had a hand in bringing this one to me
so I couldnt refuse. Could I?
******
The graphic used on this project was found awhile back, I dont know the source.
Read More..
HOW TO PAINT A SHABBY CHIC DRESSER
Minggu, 07 Februari 2016

Here in the north west the preference for painted furniture is a smooth finish. To get an amazing
soft and smooth finish with ASCP I use my paint sprayer but ASCP is used by many who want a
smooth finish but only have a brush. I answer countless questions on-line and in person about getting
a smooth finish with a brush and thought I would write an article for the rest of you wanting some tips.
soft and smooth finish with ASCP I use my paint sprayer but ASCP is used by many who want a
smooth finish but only have a brush. I answer countless questions on-line and in person about getting
a smooth finish with a brush and thought I would write an article for the rest of you wanting some tips.

These tips are best used in creating a shabby chic finish with light distressing.
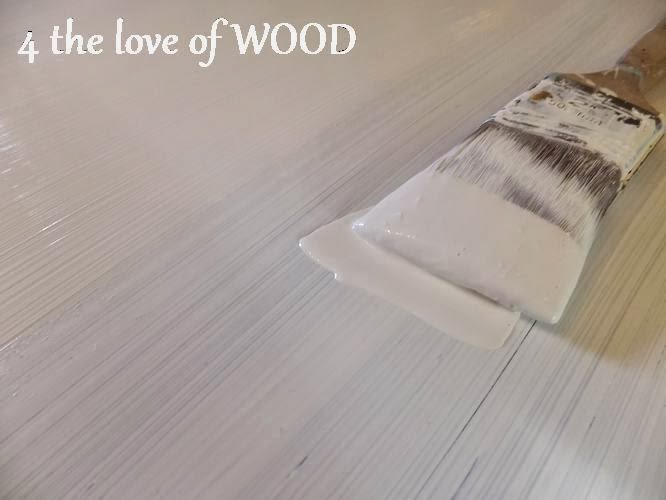
Start with a clean soft, medium to high quality paint brush.
A dirty brush or a cheap brush will work against you.


Brush your paint in one direction, usually with the grain of the wood.
Do not linger while you are painting, be quick with your strokes and move along.


Each coat should be brushed in the same direction.
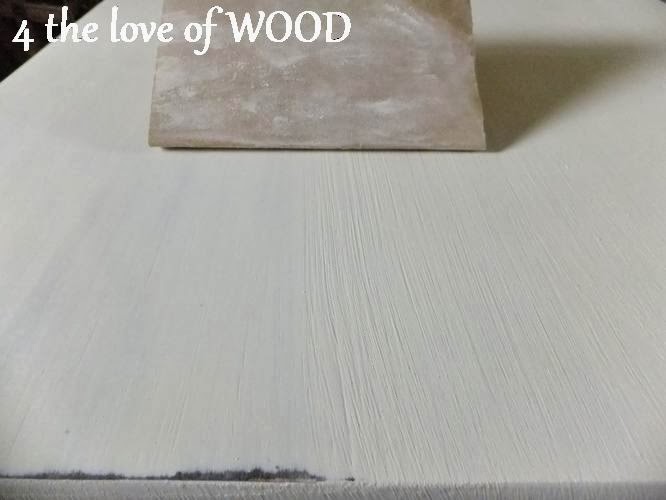 |
| SANDED NOT SANDED |
Use a 220 grit sand paper to smooth the surface.
Sand in the same direction as your brush strokes.
NOTE: Annie Sloan Chalk Paint sands very easily.
Continue smoothing with your sand paper and do a little extra around details. The final step to ASCP
is waxing. When your surface is smoothed like this, waxing becomes even easier.
For the hardware on these drawers I used wet distressing just on the pulls.
Check out this link to learn more about distressing with water:
http://blogspot.ca/2013/02/the-art-of-wet-distressing-tutorial.html

Langganan:
Postingan (Atom)