Tampilkan postingan dengan label paris. Tampilkan semua postingan

RICH ESPRESSO FINISH black and white paris dresser

Senin, 02 Mei 2016

 
Richer than black, warmer than ebony, its ESPRESSO!
and Im not talking about coffee ladies.
 
 
I painted the top of this Paris rue dresser with one coat of ASCP Graphite over a medium colored
wood finish. Graphite is a dark charcoal color but is too flat on its own.
 
 
Once the paint dried I applied a liberal layer or 2 of ASCP dark wax.
 
 
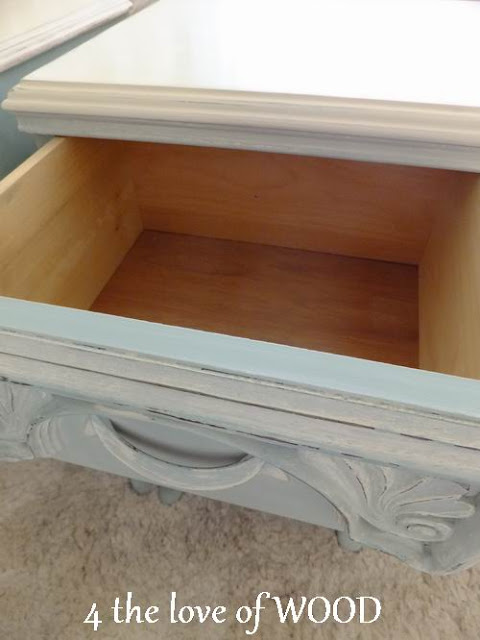
Above you can see the upper edge has dark wax on it and the lower edges is just raw graphite paint.
I took a dozen photos to show you this and its still iffy whether you can see the difference perfectly.
 
 
The dark wax takes a long time to dry if you want it to be rich and heavy. I let it dry for several days,
 buffing occasionally then adding a coat of clear wax to give it a nice shine.
 
These handles are done the same way as the Etsy hardware.
 
I added some well placed graphics to the drawers.
*Well placed* is an interesting term considering I tried several different ideas,
in several different locations, sanding away the mistakes in between attempts.
 
These graphics were drawn and filled in with black paint pens. 


Read More..

HOW TO HIDE STOLEN APPLIQUES IN PLAIN SIGHT paris blue nightstands

Kamis, 31 Maret 2016

 
A lucky lady contacted me over on Facebook when she saw a glimpse of
my unfinished Paris Blue Night Stands
I dont often get sentimental or anything when my furniture leaves for its new home,
but these 2 pieces looked so amazing I did mourn the lose for a short time.


Yesterday I shared how to color your wax and promise
to show all the different elements that went into transforming these
homely little cabinets into beautiful bedroom pieces.
 
 
#1 Remember to take a real before picture.
(not one after you remove the hardware and start painting)
#2 Add new curvy front kick.
(cause your too lazy to fix the chipped and peeling veneer)
 
 
#3 Turn upside down and install legs.
(perfect time to remove cobwebs - customer wont pay extra for them)
#4 Paint some more before you finish.
(how else are you going to get those signature paint streaks in your hair)
#5 Glue the appliques to your drawer fronts.
(no one will ever suspect you pride them off a piece of furniture road side)
 
 
#6 Start waxing.
(cause you are still not finished)
#7 Install drawer handles and paint some more.
(who would have thought, the original ones worked best)
#8 Add another applique.
(cause you can)
 
 
#9 Build and install doors.
(dont take any photos of this step)
  
 
#10 Paint tops in white and wax to a high gloss.
(dont tell you wanted to make them look like marble but everything
was already taking so long and costing too much)


#11 Take pretty pictures.
(so you can reminisce later in life when you are too old to remember)


Coming soon ...
I will be addressing my obsession for bedside tables
with this next set seen below.
 
There is a sneak peak over at Facebook if you cant wait!


In other news a new batch of Georges candles have made their way to
The Passionate Home. Be sure to get yours before they sell out again.
TPH is in the picturesque courtyard of downtown Langley at 20506 Fraser Hwy.
Read More..

FENCE BOARD CLOCK paris clock

Jumat, 19 Februari 2016


Here is a little something I whipped up for a Christmas gift.
 
 
Okay its not really little at 28" across and Ive never made a clock before but I have been wanting to
try this for some time. In reality I made a cool round sign and learned some valueable lessons
on installing a clock mechanism with really long hands.
 
 
I built the clock face from old fence boards, screwing strapping boards across the back.
 
With a jigsaw I then cut it into a circle, this photo was taken before I got a nice clean cut.
It helps a great deal if you start out with a NEW sharp blade.
 
I used ASCP pure white for the face,
 
with grey and black for the graphics.
 
Here you can see the detailing of the distressed wood and the fleshly finished
Roman numbers that still needed to have an aged look. The tape was used to
provide a nice edge to the outer circle I added in black.
 
 
The fence boards measured 3/4" thick and I bought a clock mechanism made for a 3/4" surface,
however I still needed to drill out a bit to get the nut on and tightened up the right amount.
 
The final step and I suppose very critical one is to get the hands installed correctly
making sure they have enough space between each so your new clock can keep perfect time.
 
 
A little bonus for those who are local to White Rock
www.cottagepaint.com
will be having Hands-On Demo for image transfer classes
just like this pillow seen below
 
January 19
OR
February 3
check out the link and contact them if interested.


Read More..