Tampilkan postingan dengan label box. Tampilkan semua postingan

Another tea box

Sabtu, 14 Mei 2016

Hi Everyone,
Well Im back in the shop this afternoon and evening and Ive made the second of our 3 tea boxes. Here are photos of the side and the top:
This one is made out of the same woods as the first tea box, the only differences being the overall shape of the box and this one has a red knob made out of Brazilian cherry. Its a little smaller than the previous tea box as well. 
Tomorrow Im going to sand all of these tea boxes and get them ready to be finished. An oil and beeswax finish is in order for these two. Afterwards well started on the third box.
More tomorrow,
VW
Read More..

Tea Box Part 2

Senin, 25 April 2016

Back again-
Time to cut out the lid. Here are several photos showing the lid being shaped:
The lid is made from two pieces of white oak. I like oak but its a coarse-grained wood and it doesnt hold fine detail well. The color is interesting and its hard and durable so Ill probably be using it again in the future.
I turned the lid and the box together one last time and here is what we have at this point:
It needs a considerable amount of sanding and Im not sure it I like that section in the lower half of the box.  Ill have to cogitate on that. But the box is nice and it will hold a lot of chocolate or whatever my friend choses to put inside.
Our next box is made out of the same materials except the lid is made from white oak with a Brazilian cherry knob on top. The box will also be shaped differently so Ill post photos of that box.
Our next thing to do is to glue the red birch box pieces together in order to make a turning block. Im going upstairs for a bit and have some lunch and some hot coffee and Ill be back later today with more photos.
VW
Read More..

Tea box part 1

Senin, 11 April 2016

Good Morning All,
Ive begun working on shaping and hollowing out this first in a series of three tea boxes.  This box will be given to a wonderful friend who has been very kind to me and this is a way of saying thank you. And as she is very much addicted to chocolate, I suspect this box will never hold any tea but will become a chocolate stash in her office!
These first two photos show the box mounted on the lathe with some preliminary shaping in the second photo:
This second photo shows the foot of the box and Ive cut it down substantially from its original size. I  think it looks better and lowers the center of gravity of the box so it doesnt tip over.  Ive also left a rough section that will become the rim of the bowl. Im shortly going to put the top on the box and turn it together as a unit for a few minutes to true up both pieces and make the diameters match up.
Lets get the top on the lather and turn a tenon in the underside and flatten out the surface of the lid:
Here are the two parts jammed together on the lathe ready to be turned together as a single unit:
And here we are several minutes later:
I wanted to give the box kind of a pot-bellied shape and so I rounded off both pieces. The top still has a considerable amount of shaping left to do.
Truing up the bottom portion has also given me a sense of were the outside surface of the box will be and also that will allow me to establish the thickness of the wall and thus the inside diameter of the box;
And here we are about 30 minutes later:
The box portion has turned very well. The sides and bottom are a little less that 1/2 thick and this gives the box a heavy, substantial feel. It will also help to keep it from breaking should it ever be dropped.
Here is a photo of the side:
Ive left a broad, flat bead on the side of the box. This provides a transition to the lid.
This portion of the box will be sanded completely and then taken off the lathe. The lid remains to be turned and since this is a very visible portion of the box, well take this slowly.
Im going to stop for about and hour and come back to the shop later this morning. Stop by for more photos and explanation.
VW
Read More..

A STORAGE BOX SPRING REVIEW

Rabu, 06 April 2016

 
Ive mentioned my storage box spring a few times over the years and every time I do I get asked
more questions about it so I figured it was time to offer my thoughts on owning one.
 
The short and sweet answer is ...
I love it! Best furniture purchase I have ever made!
 
 
Hidden under this unassuming well made bed is all my Christmas storage.
And its easily accessed by a looped nylon strap at the end of my bed.
 
 
Check it out!!!
 
 
After I moved the last time I was fed up with my useless box spring. I wanted to get rid of it and
 have some kind of platform bedframe instead. Box springs take up so much space in a small home
 and I wanted to reclaim the space for storage. I learned about these new and amazing storage box
springs and had to have one. When closed they look like any normal box spring and your mattress
sits on top of it.
 
 
I have a super heavy Tempurpedic mattress and the lifting shocks hold it up just fine.
 
 
For those of you thinking about getting one I hope I have offered some insights.
Use the search words *HYDRAULIC STORAGE BED* when looking.
Read More..

REPURPOSING AN AMMO BOX how to

Senin, 07 Maret 2016


Im re-sharing this post with more building details for
others who want to re purpose their own ammo boxes.
 
 
I got my ammo box after George couldnt resist bidding on it at an auction.
 
 
Thank you honey ... now what am I going to do with this?
 
After a year passed and I thought about it long and hard,
I ended up combining it with a saw horse into a 2 sided sofa table.
 
George also picked up the sawhorse along his travels,
again Thank you honey ... but what am I gonna do with this thing?
 
 
The ammo box was turned upside down and the top of the sawhorse was secured
with screws and some wood bracing inside the underside.
 
I took the door / lid right off and used it as the bottom shelf between the legs.
 
 
I reused the door hinges to secure the shelf to the legs.
Of course there were only 2 hinges so they got installed at the back so you could see them,
and the front was screwed directly to the legs.
 
I left the original latch and rope handles to add to the rustic and original charm.
 
 
I used a light white wash so all the stamped labelling could still be seen throughout the piece.
It is not shocking from a distance but can be read up close.


This re-purposed ammo box table found a lovely new home as an entry table.
 
Read More..

Earring box finished

Jumat, 19 Februari 2016

Hi Everyone,
The earring box is finished. Here it is with a preliminary coat of oil:
More later,
VW
Read More..

GETTING BACK TO WORK white table bread box

 
I cant believe what this flu has put me through in the last 2 weeks.
I have never experienced anything like it before and do not wish it upon anyone else.
Im still sick and napping several times a day, but the projects have started again. 
 
 
Im taking it easy doing up some small stuff and simpler painting projects.
 
This table needed repairs, cleaning, and a new paint job
I could manage that.
 
It has a rustic white finish with a wax top coat.
 
It can be used in many different places in your home,
bedside table, extra kitchen surface, desk, front entry, laundry room, the list goes on. 
 
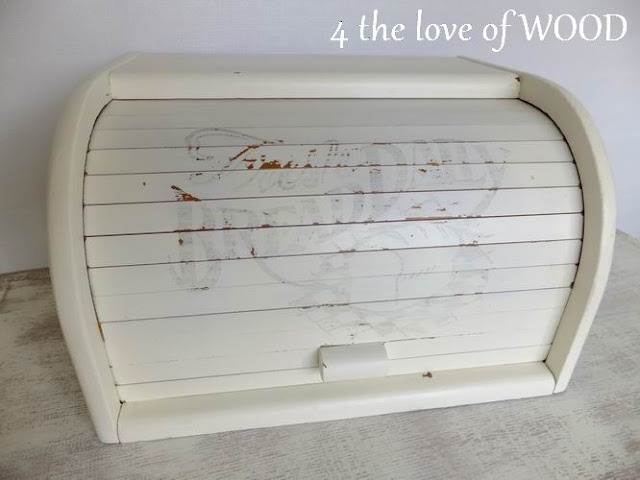
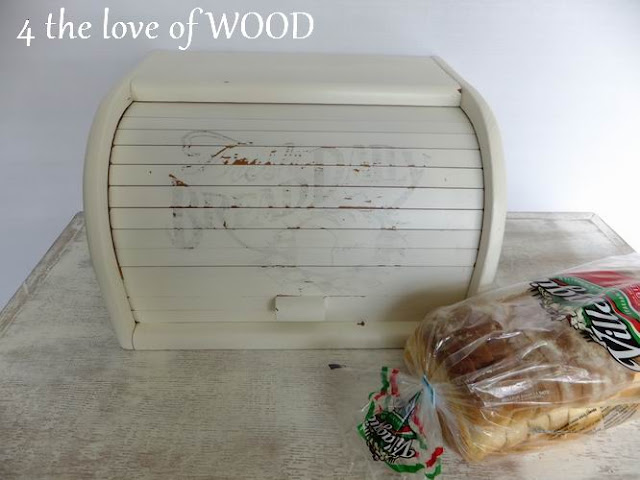
Another project I tackled was a bread box.
 
I found this one on our Thrift Shop Hop last week.
I painted it a creamy white and added a fresh bread daily graphic to the door.


Read More..

Better Box Fan Air Purifier

Minggu, 14 Februari 2016

A better more efficient and odor eliminating homemade air purifier than just taping a 20x20x1 filter to a box fan. Sometimes you need to help clear the air in a dirty environment but dont want to use an expensive air purifier such as in a room after renovating and painting. Heres a cheap and easy way to build one.Air purifiers can be expensive and youve probably seen articles recommending to just put a 20" x 20" x 1" furnace filter on a cheap 20" box fan and POOF! instant cleaner air for not a lot of money. It really does clean the air pretty cheap.
Theres a problem with this though. These fans werent designed to be run with a filter. The filter will restrict air flow which will put a higher strain on the motor causing it to use more electricity and in worse cases could be a fire hazard. The higher the MERV rating (cleaning efficiency) of the filter the more stress it will put on the fan.
Dont worry! You can still have your cheap air purifier as long as the filter area is increased to decrease the effect of air resistance. Instead of using one 20x20x1 filter well use two 20x25x1 filters which increases the filter surface area over 250%. Its a little more expensive because youre using two filters instead of one but the increased filter surface area also helps the filter last longer before it gets clogged up and were saving on energy use compared to a single filter.
I cant take credit for the design, I found it via Marshall Hansen Design but Im using different filters.
I recently remodeled my basement and theres a lot of dust (including drywall dust and sawdust) and fumes from paint, cleaners and other building materials. Its an underground basement and mold has to always be a conern too. Because part of the space will be my home theater in the future I plan to get a more expensive air purifier thats smaller and quieter such as this Fellowes Quiet Air Purifier AP-300PH with True HEPA FilterFiltrete Odor Reducing Air FiltersThe filtering power of these Filtrete Odor Reducing filters isnt listed on Filtretes website or on Amazon but I contacted them and found out that these filters have a MERV 11 rating and filter 90% of particles between 1-10 microns which makes them more efficient than the Filtrete Micro Allergen Reduction FiltersThe box is sealed very well. Not only is it taped but the seams are also glued together. To get the filters out of the box I cut the top where its perforated with a utility knife as shown.
Be careful not to cut too deep and damage the filters. Keep the box someplace safe to the side while we continue. 

Step 2: Hinge Filters

Start by taking 2 of the filters out of their plastic wrappers and lay them one on top of the other with the air flow arrows pointing towards each other. With the Odor Reducing Fitlers this means the black, carbon sides will be facing each other.
With the filters lined up, tape one of the short (20") edges of the filters to create a hinge between the two filters as shown.
I decided to go with white duck tape so it looks a little nicer but it makes it hard to see in the photos against the white cardboard filter frame.

Step 3: Tape Filters To Fan

Lay the box fan face down on a flat surface to mount the filters to the back making sure the bottom of the filters are about flush with the bottom of the fan and do not extend past the bottom.
Use a strip of duck tape to secure each side to the side of the fan.

Step 4: Cut and Attatch the Cardboard

Cut out one of the large sides of from the cardboard shipping box, place it over the top of the of the filters and secure it with a strip of tape to the top of the fan. Position it so that its pretty even over both filters but it doesnt have to be perfect.
Using a pencil, trace around the filters (while pressing down the cardboard so nothing moves) to mark where the cardboard needs to be cut.
Lift the cardboard up (the front piece of tape acts like a hinge) and cut along the lines to trim the sides. By the way, I really like these Fiskars Cuts+More 5-in-1 Multi-Purpose ScissorsRepeat the process for the bottom cardboard. The other large piece from the box is seamed but its taped and glued and very stiff so it shouldnt be an issue but you can run a strip of duck tape over the seem if it makes you feel better.
Also keep in mind that the bottom of the fan has feet. I positioned the cardboard underneath the feet and then pulled the feet out to tape.
After taping up the sides of the bottom cover to the filters, I added an extra strip of duck tape all the way around where the filters/cardboard meets the fan for added support. The rounded corners of the fan means there might still be an air gap there so check them and add extra duck tape if necessary. On the bottom there are also some holes, duck tape over those as well. Finally, replace the feet.

Step 5: Seal The Back

Where the hinged filters meet the cardboard in the back, add another strip of duck tape for support and to seal any gaps.
Give another look around the seams to make sure there arent any gaps. If you find any, tape them up.
When using the fan, I always make sure that the cord isnt underneath the cardboard and instead is under the metal fan chassis, just incase something goes wrong and the cord overheats. Can never be too safe.

Replacing Filters

When its time to replace filters, use a utility knife to cut the filters free but leave the cardboard in place. Then just hinge and attach the new filters. 
Read More..