

Ill take it ...

I was excited when I found this cabinet because of the size. Most of the time I must turn away
from overly large beautiful pieces because Im not physically capable to work on them alone or they wont fit in my home to be worked on. This was one of those larger pieces I could consider because it wasnt too large and it was 2 pieces.
Ill get straight to the before pictures so you can understand my vision with this project.

Mid 70s china cabinet with glass panels everywhere in the upper portion.
The glass just had to go ...

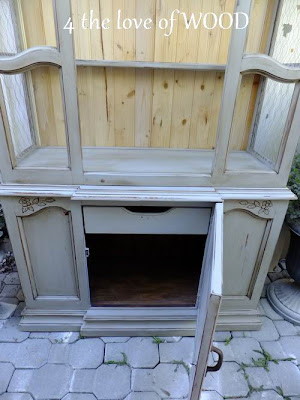
Below you can see the upper cabinet completely stripped down, no glass, no backing.
I prefer to work on cabinets from the open back, especially to get a good paint job inside.

The original backer was a piece of cardboard with a picture of wood on it.
I redid the back with thin tongue and groove bead board. Every now and then I find
a package or 2 while yard saling, just enough to complete some of my projects.


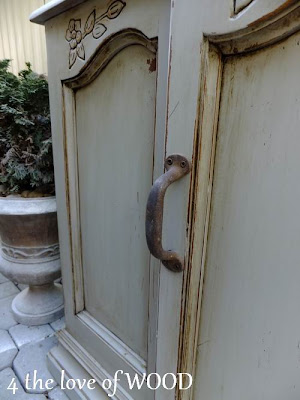
I seriously wanted this cabinet to look like it was from an old farm house. I painted it with an ASCP
light grey mix, distressed it, sealed the Chalk Paint with Minwax Natural, then got the final look with
Annie Sloans Dark Wax. The dark wax does such a great job of simulating age.

The hardest part on this project by far was installing *CHICKEN WIRE* in the upper cabinet
but it looks absolutely perfect on this piece and there is no doubt its from a farmhouse now.
Chicken wire is also known as hex wire, keep that in mind if you are in
the hardware store about to ask for it. When working with it you MUST have patience,
you SHOULD wear gloves, and the right stapler and cutters might help calm the process a little.
Once again my roll was found at a yard sale.

 Read More..
Inside the lower cabinet is open storage with a cutlery drawer front and center.
I added the perfect rustic old handle to the door.


 Be careful not to cut too deep and damage the filters. Keep the box someplace safe to the side while we continue.
  With the filters lined up, tape one of the short (20") edges of the filters to create a hinge between the two filters as shown.
 I decided to go with white duck tape so it looks a little nicer but it makes it hard to see in the photos against the white cardboard filter frame.
 Use a strip of duck tape to secure each side to the side of the fan.
 Using a pencil, trace around the filters (while pressing down the cardboard so nothing moves) to mark where the cardboard needs to be cut.
 Repeat the process for the bottom cardboard. The other large piece from the box is seamed but its taped and glued and very stiff so it shouldnt be an issue but you can run a strip of duck tape over the seem if it makes you feel better.
 After taping up the sides of the bottom cover to the filters, I added an extra strip of duck tape all the way around where the filters/cardboard meets the fan for added support. The rounded corners of the fan means there might still be an air gap there so check them and add extra duck tape if necessary. On the bottom there are also some holes, duck tape over those as well. Finally, replace the feet.