

Here are some tips on installing cross supports for your bed.
This frame is built for a box spring and mattress, if you wanted to use it without a box spring
you would need a center support to the floor and twice as many cross supports i.e.. 16

These side rails never had any supports for cross slats so I added them. 

You do remember George demolishing the pretty dresser a while back? ... with a vehicle?
Well here is a perfect time to show you how some of that wood is being reused.


These metal brackets are perfect for making beds with. I was only able to find three sets this year
which means I can only make three beds at this time. They are from old water bed rails.
You need 4 per bed, one for each corner.
You screw them to the side rails with nice strong metal screws and on the post you add
Pan or Truss screws so the bracket can slide up and off. This makes your rails install quick and easy.
This type of screw is meant to use on metal because the back is flat and will sit tight against it.
These cross slats are old Ikea slats that I have made stronger by combining 2 together.
I screw a short one on the bottom middle of each full length board as seen below.


 Read More..
All of my beds are built during the summer months. I collected and stored random parts all
year long waiting to repurpose them and make them into something fabulous.
This bed is built with different parts I got at different times and put together.
year long waiting to repurpose them and make them into something fabulous.
This bed is built with different parts I got at different times and put together.
The color of the bed is a bit tricky to see in this light. There is 3 layers, a white base, with
a very strong turquoise blue next and a soft sky blue on top. It is heavily distressed throughout.
The Walnut Bowl
Selasa, 02 Februari 2016
Hi Everyone,
Well when I came home today, I had a serious case of wood turning fever and I had to get outside and work on the walnut bowl I started last week. So thats exactly what I did. I smoothed the underside and cut a very shallow foot:

 Wow, check out that grain. Isnt that lovely?
I decided since the grain pattern is so lovely not to add any adornment to the surface of the bowl. The wood speaks for itself.
Having decided that, I flipped it over and began hollowing it out. Here is a photo of the lathe spinning and Ive cut out the edge of the rim:

Well when I came home today, I had a serious case of wood turning fever and I had to get outside and work on the walnut bowl I started last week. So thats exactly what I did. I smoothed the underside and cut a very shallow foot:
Wow, check out that grain. Isnt that lovely?I decided since the grain pattern is so lovely not to add any adornment to the surface of the bowl. The wood speaks for itself.
Having decided that, I flipped it over and began hollowing it out. Here is a photo of the lathe spinning and Ive cut out the edge of the rim:
Here we are several minutes into hollowing it out: And here we are about 15 minutes after the above photo:
 Now the question arises: How deep should the bowl be cut? This blank was originally about 2 1/2 inches thick so we cant cut forever but it does need to be a little deeper. But how much deeper?
 I cut it about 1/4 inches deeper and decided to stop. Here is another photo:
 Ive taken it off the lathe and brought it upstairs and Im just going to contemplate it for the next day or so.
What do you think? Should it be a little deeper or should I play it safe and leave it as is?
Let me know what you think.
More tomorrow,
VW
Read More..


And here we are about 15 minutes after the above photo:Now the question arises: How deep should the bowl be cut? This blank was originally about 2 1/2 inches thick so we cant cut forever but it does need to be a little deeper. But how much deeper?I cut it about 1/4 inches deeper and decided to stop. Here is another photo:Ive taken it off the lathe and brought it upstairs and Im just going to contemplate it for the next day or so.What do you think? Should it be a little deeper or should I play it safe and leave it as is?
Let me know what you think.
More tomorrow,
VW
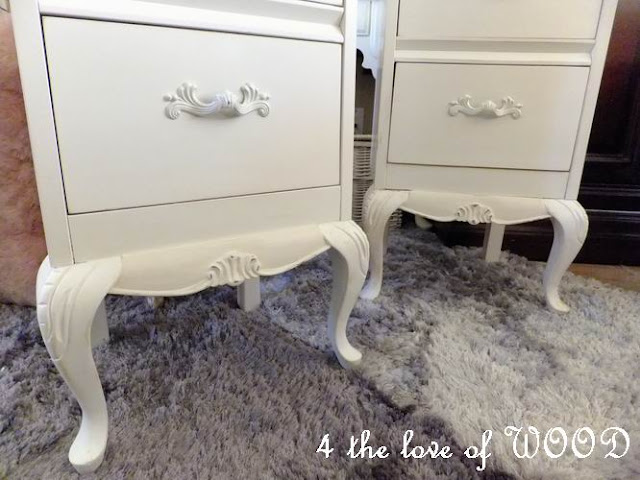
PRINCESS DOGWOOD nightstand
Ive been having a devil of a time lately finding good pairs of bedside tables to work with,
but I do have a couple of singles sitting around here so I got to working on them.
Nicknamed Princess Dogwood because this is the ultimate little princess bedside table
and for the Dogwood styled handles I stole from Georges Etsy Shop. 


The legs are straight off a rotten chair, and I mean rotten!
The legs were already falling apart and had to be repaired before I could think about using them. 


 Read More..
I needed a new top and unfortunately my new silverware drawer had the perfect piece.
The scalloped detail was popped of an MDF coffee table,
the back plate is an old door handle embellishment, and the detailed trim is from an old picture frame.
The inside of the drawers also got painted.
SMALL SPACE DECORATING TIPS round one
Senin, 01 Februari 2016
Understand the pros & cons of high back chairs.If your living room chair has a tall back it can help define your space were as a high back dining chair or bar stool will make a room feel closed in because sight lines are being blocked.
Opt for a headboard only.You will always have more space in your bedroom with a small footboard or no footboard attached to your bedframe. The foot of the bed is also a great place to stand and fold laundry.
 |
| http://blogspot.ca/2013/08/i-live-in-single-wide-trailer.html |
 |
| http://blogspot.ca/2012/07/george-has-new-skill-candle-making-and.html |
 |
| http://blogspot.ca/2012/09/sun-fun-and-burlap.html |
 |
| http://blogspot.ca/2012/09/my-decorating-project-bedroom.html |


