Tampilkan postingan dengan label fixing. Tampilkan semua postingan

FIXING WOOD SPLIT hinge

Senin, 09 Mei 2016


When you have a split in your wood furniture you can stabilize it with a left over hinge used sideways.
 
These photos are taken of the underside of a broken chair.
 
First I glue and clamp the seat back together, let the glue set for a day.
I also stabilize the repair with a hinge screwed over the split on the underside of the chair.
 
 
Here is the fixed chair.
 
HAPPY FIXING
 
 
Read More..

FIXING DRAWER DAMAGE drawer stops

Rabu, 23 Maret 2016


Many antique dressers have some damage to the drawers. This dresser was no different.
If there is too much weight in a drawer the bottom will push down and if your dresser has
metal drawer stops they will start to dig a groove into the wood.
 
The groove can get very deep, even go right through making a nice big hole in your drawer bottom.


To fix the problem move the metal drawer stop. You can pull it out with a pair of
pliers and use a hammer to re-install it. The bottom is a point that hammers into the wood.
 
 
If you dont have any drawers stops and you are looking replace them check out this article:
http://blogspot.ca/2011/03/stop-drawer-stop-tutorial.html
 
HAPPY FIXING
 
 
Read More..

FIXING A BROKEN DRAWER tutorial

Senin, 14 Maret 2016

 
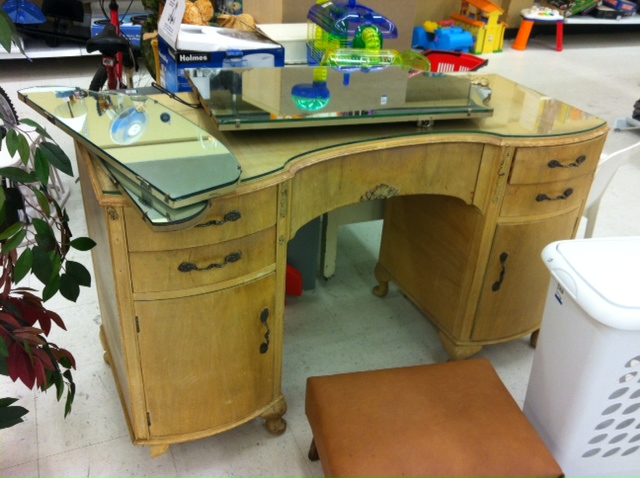
Okay ladies this one is for you.
 
 
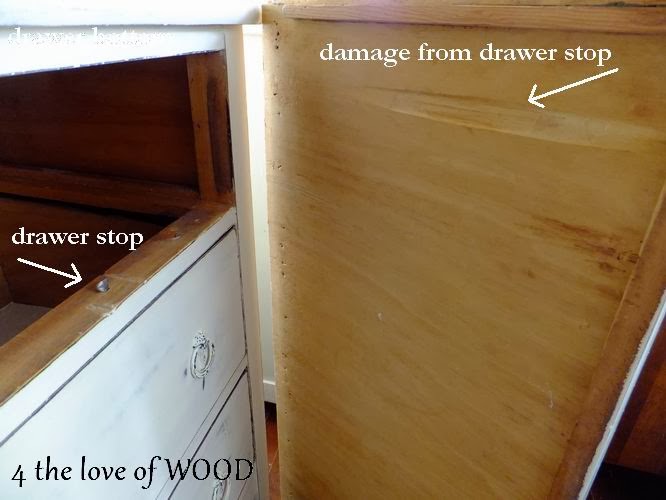
A common issues with old drawers is broken bottoms and stains in the wood.
 
Im going to show you how to fix both issues with one repair.
 
 
We need to fill in this gap with a new piece of wood but the break part doesnt have a straight edge,
this makes things a bit difficult. 
 
 
But wait ... we do have a straight edge at the front of the drawer. 
 
 
Most drawers even modern ones are built with the bottoms slid into place in a groove.
Slide your broken board completely out of the groove, some nails may have to be removed. 
 
 
 This next step is probably the hardest part of the job,
you need to find a new piece of wood that is the same thickness as your existing bottom.
You could always replace the whole bottom by taking a trip to your local lumber store with
measurements in hand and get them to do the work for you.
 
 
 Im showing you how to use what you have and just fill in the gap.
The wood I found and used is a 1/4" thick scrap of plywood.
 
 
Cut the length of the new board to fit into the grove and slide it into place.
You can use a hand saw, a jigsaw, a circular saw, or even a pretty please husband!!


Remember that stain in your drawer ....
 Take your stained drawer bottom and flip it over and slide it in to the grove.
 
 
Your stain is now on the bottom and your gap is gone.
 
 
Add a few nails at the back of the drawer to hold your bottom in place.


There you go ... a functional clean drawer that hopefully cost you nothing but a bit of digging
through your shed or garage.
 
Read More..

FIXING FLAWS sigaut table

While working on this cute table I got a call from someone looking for a cute table,
  
so needless to say this table found its new home right away.
When I first saw the table, there was nothing wrong with it ... so I thought!
BEFORE
But when I started to work with the table I realized how wobbly it was.
It really was not safe to put a lamp or other breakable items on.
Upon further inspection I found it unscrewed into more pieces than expected.
That including 3 individual legs, the leg connector, the center post, and finally the top.
There seemed to be a design flaw with how loose the legs fit into the connector,
causing the table to weeble wobbled all over.
So I fixed it and took photos to share with you how it was done.
First of all I would always suggest putting screws in a discreet or hidden area but
this time around the strongest fit was going to be out in the open.
It is always best to pre-drill and counter sink your screws.
Wood glue is amazingly strong ... so if you got it, use it!
I used 3" wood screws that go right through to hold the leg on the opposite side.
Then all you have to do is fill over the screw heads, sand and paint.
Nice and sturdy now.
And to keep you in the loop of what is coming
Im working with a 1930s china cabinet, this one is taking some time because my ideas are grand,
 an antique desk chair for a birthday girl, and this fabulous desk shown below. 
Special THANK YOU to Darcie for the heads up on this desk.
Read More..

FIXING DRAWER STOPS

Kamis, 03 Maret 2016


While I was working on this pretty two color dresser I discovered all the drawer stops were missing.
This meant the drawers would push too far inside the body. In place of some of the stops I found
nails bent over, apparently this does the job but I can see trouble brewing leaving these behind.
 
 
I removed the nails and I went and found a paint stir stick and started to cut it up into 1" long pieces.
 Each drawer would need 2 stops and this dresser had 5 drawers making that 10 total. I used my Anvil
 Cut tool from Home Hardware (Canadian) it has a sharp knife blade that cuts through thin wood.
 
 
A dab of wood glue where the stop needs to go and press it into place. If you have clamps to hold
them while drying that would be best. You can also use some masking tape to hold them in place.
 
 
You can find a bit more info in another article I wrote about making drawer stops here:
http://blogspot.ca/2011/03/stop-drawer-stop-tutorial.html
 
HAPPY FIXING!
Read More..

FIXING A HARP AND MIRROR old hinges

Senin, 01 Februari 2016


Here is a great use for one of those old hinges we all have in the junk drawer
or filling up a jar on the garage shelf.
  
REPLACED HINGE                               ORIGINAL MECHANISM
 
This mirrors left pivoting mechanism was twisted and broken off making the mirror unusable.
While the owner is looking for a replacement part an old hinge will keep the mirror in place.
The hinge can be used vertically or horizontally but the mirror will not be able to pivot.
 
HAPPY FIXING
Read More..