Tampilkan postingan dengan label dressers. Tampilkan semua postingan

FENCE BOARD GREY DRESSERS

Rabu, 18 Mei 2016


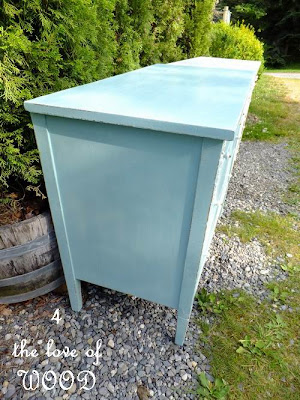
I finally got around to working with these twin dressers I have. These are the type of pieces that you
 might have bought from Sears back in the day. They have a glossy white hard finish that is in pretty
good shape. The drawers had gold detailing around the edge and one face was broken in half.
 
 
I started by painting 5 of the drawers in a custom grey and left them in the hall to dry over night.
The sixth drawer I started to glue and repair to the point of repainting. That took days!!
 
To get the grey weathered fence board look on the drawers took 2 easy steps. I removed half of the
 grey paint by using a moist scrubby sponge and washed each face length wise. I let the faces dry
again before waxing them. Once the wax was dried and buffed I scrubby length wise again to remove
more of the grey paint. Each step removes the paint in a slightly different way and creates a unique
weathered board look. I love how the strong grey stands next to a bright white.
 
 
I uses 12 French provincial handles sprayed in a bright white oil base paint.
 
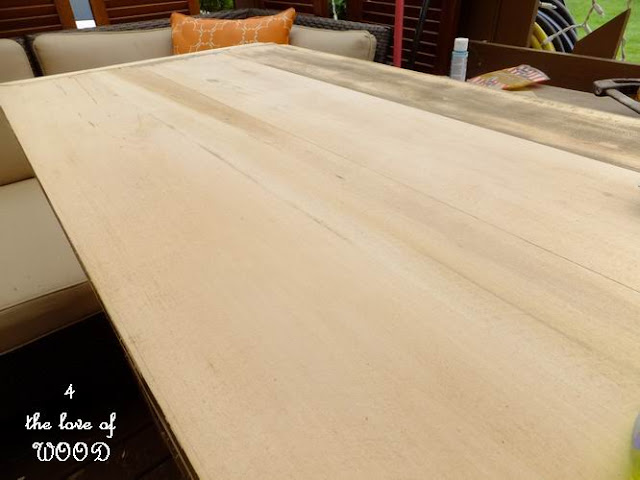
Because the weather has changed and there are still a few pieces of finished furniture in my back
 work room I had to work on these in the kitchen. Check out the SHOWROOM page for the price
and dimensions of these dressers and to see what else might be available.
 
Read More..

REBUIDING ANTIQUE DRESSERS replacing drawers

Minggu, 01 Mei 2016

Both of these dressers where curb side finds. They were from different homes
during a community clean up week and understandably destine for the dump.
Not many ppl could or would have wanted to save them, they were that bad.
It is hard to know where to start explaining what happened.
But I will start where you can see there is something wrong.
In this fairy tale picture of the first / white dresser you see no top drawers.
This is correct ... absolutely no drawers or parts could be found in the rest of the rubble pile
during the time I was strapping her to the roof of my SUV and getting hoots and haulers
telling me what a great find I got.
"Ya right buddy get a closer look then tell me that."
I ended up making new drawers!
Okay I did not make brand new ones, thats not what I do here or even what I suggest you do.
I was lucky enough to have some old desk drawers that I was able to make work after cutting.
They were the right height but too long and a bit narrow.
After altering the drawers so they werent so long I had to remove and replace
the middle supports inside the dresser because the new drawers were narrower.
Get ready for the technical diagrams ...
if you have a short attention span, just like pretty pictures, or simple never plan to do this yourself
 skip past the next 3 images.
The dresser is laying on a table and on its back to make working inside easier.
You have made it past the how things work section ...
Now enjoy the rest of the pictures.
I also removed and replaced the original vertical divider on the front with something wider.
I promise it really is the same dresser.
There are a lot more details to share that went into this dresser and the other, like
repairing broken drawers,
rebuilding a drawer you only have half of,
rebuilding missing applique bits,
gluing veneer down on countless edges
gluing bubbled veneer in the center of a surface
filling in missing veneer
replacing an apron,
and how about
building a complete back for a dresser,
but all this in due time.
Read More..

STACKING DRESSERS

Minggu, 20 Maret 2016


This is a photo taken in my dressing room of two stacked dressers.
I really enjoy these dressers and many have asked about them after seeing them in the
background of some recently posted photos. To get the storage I needed I stacked them. Its
 not common to find a pair of identical vintage dressers so I took advantage of the opportunity.


Here is what they looked like when I brought them home. They were a real mess.
I stripped everything off the tops to find this beautiful soft wood ...
and I didnt stop there. I stripped almost every other surface on both dressers.
I did not use chemicals on these I sanded them with power tools.
     
 
I gave both dressers a white wash and added cast iron plaques to the drawers
so that I can label the drawers using chalk.
 
 
The top drawer was too high to use as a drawer so I turned it into a hinged door.
 
 
I left a little strip of the original paint on the drawer edges cause I liked the rustic feel of it.
 
It has been years since I fixed these up for the dressing room and I still love them to this day.
Not fancy but super chic!


Read More..

MATCHING ANTIQUE DRESSERS 1920s

Senin, 15 Februari 2016

 
I REBUILT A WONDERFUL PAIR OF 1920S ANTIQUE DRESSERS.
 
Oddly enough these 2 dressers are the exact same size.
One is finished in Old White over Aqua and the other is Aqua over Old White.
 These beautiful dressers were both on their way to the dump.
I took lots of photos while building them.
I will be sharing the BEFORES and the many fixes over the next few days.
UPDATE:

http://blogspot.ca/2012/07/the-prince-princess-replacing-drawers.html
http://blogspot.ca/2012/07/repair-tips-and-tools-rebuilding-drawers.html 
Read More..