Tampilkan postingan dengan label door. Tampilkan semua postingan

Way To Trim a Door

Jumat, 22 April 2016

Heres an easy way to cut and install trim around a door that doesnt need a lot of measuring and gets you tight, accurate mitered corners. This is a little different from how most people Ive seen measure and install door casing.
  • Caulking gun
  • Tape measure
  • Pencil
  • Step 1: Measure Opening Width

    This is the only measurement I take of the door. Measure the width of the top of the opening where the top piece of door trim will be installed.
    To this measurement add 3/8". This will leave a slight (3/16") reveal around the door frame. This is the reveal I like to use. If there is a requirement to have a different reveal make the necessary adjustments.
    If you want to be more precise you can set a scribe (compass) to 3/16" and draw a line around the door jambs to help line up the pieces.

    Step 2: Cut Top Door Casing

    Unlike other methods Ive seen, I start with the top piece of trim first. I find this makes it easier to get tight corners and a good fit.
    The top section of door casing has a 45 degree cut on each end. The width of the bottom portion is the width we determined in Step 1. In my case I had a 28" opening so I needed to cut at 28-3/8". When cut it will look like this.
    Start by trimming one end of the casing stock to give it the appropriate 45 degree angle.  You dont need to measure anything for this first cut, just cut near the end of a piece to reduce waste.
    Next, measure from the bottom of the 45 degree cut and mark for the length of the top (28-3/8" for me.) This is where it gets a little tricky because you cant just hook the end of your tape measure to the bottom of the miter. You have to hold it in place or what I usually do is use a rigid measure (drywall square or whatever is handy) instead of measuring tape. You also have to be a little more careful when making the cut because the mark is going to be on the outside.
    I own a power miter saw but I decided to use my manual miter box which I discussed in my article How To Make Square Cuts In Dimensional Lumber. It takes a little longer to make the cut but the cuts are still accurate and clean up is a lot quicker because I dont have sawdust blowing all over the room. Its faster to make the cuts closer to the work area and all I needed was a small sheet of plastic to catch all the sawdust that falls straight down from the saw. No need to vacuum!
    The door casing is positioned with the back down and the thick side of the trim against the fence. I used some small clamps to hold the casing tight in the miter box. One hand operated the saw, the other held the miter box in place. If you have a work table nearby you can clamp the miter box down. Im using some of the Irwin Mini and Micro clamps that came in a set (Irwin Quick-Grip Clamp Set from Home Depot
    As youre dry fitting the trim, you might come across some high spots in the drywall edges or compound. Take the time to trim or sand them down to get a good fit with the trim.

    Step 3: Side Trim

    For the side trim we dont need to take any measurements. Take a long piece of trim and flip it over so the back faces out and the thick side presses up against the top trim with the bottom resting on the floor. Hold it square with the top piece. Using a pencil, mark where it meets the top of the top trim piece.
    Transfer your mark to the front and mark the direction of the miter too so you dont make a mistake. Then make the cut.
    Test fit the side trim. Now you can start making more precise adjustments to the top and side so the miter is tight and everything is lining up with a good reveal. Once you get it positioned, clamp the side trim in place.
    Repeat for the other side.

    Step 4: Adjust and Nail Door Casing

    With all 3 pieces of door casing cut to size, make final adjustments to get the corners tight and the right reveal around the door frame. Clamp everything down tight and begin nailing.
    I used a pneumatic finish nailer which made things go quickly but since everything is clamped in place its not too hard to use a hammer and finish nails. Then follow up with a nail set to recess the head of the nail below the surface of the trim.
    Use 18 gauge (or 5d if hammering) finish nails along the inside to secure the trim to the door jamb. Use 16 gauge (8d) nails to secure the thicker, outer edge of the trim to the wall framing.

    Step 5: Other Side

    Repeat the steps above to trim out the other side of the wall.

    Step 6: Caulk and Paint

    When youre done with all the trim you need to install,  use a paintable latex caulk along all the edges where the trim meets the wall or door jamb. Fill in all the nail holes and any gaps you might have in the miters if you didnt get a good fit. When the caulk dries youre ready to paint. I like using Benjamin Moore Waterborne Satin Impervo mixed with a bit of Floetrol paint conditioner Read More..

    Door Frame Rot Repair

    Kamis, 07 April 2016

    My future father-in-laws back door was starting to rot at the bottom and he asked me about it. He said he wanted to know if he needed a whole new door.  I told him I could just patch it up with some epoxy putty and he looked at me a little funny. Once the job was done, he was pleasantly surprised at how good it looked and he was surely glad he didnt have to buy a new door.
    I made a video on the method I used, maybe you could use it too!
    Read More..

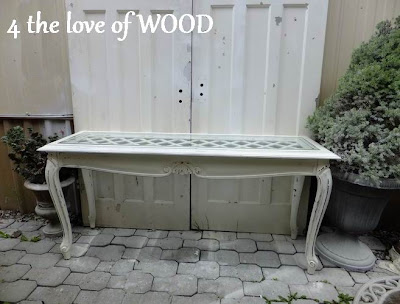
    RECLAIMED DOOR hall tree

    Sabtu, 26 Maret 2016


    The beginning of the hall stands has started.
     
     
    Remember those 2 doors you have been seeing in so many of my furniture pics?
    Ive had other plans for them since they came home but Im happy to put them to use in the mean time for a back drop.


    These ornate pieces are from a plastic copperware spoon holder.
     
    I painted the bench portion in white to match the door color before painting over everything in
    ASCP Country Grey.
     
     
    The thick enamel paint on the door had chipped off in large patches allowing
    for this look after painting and distressing.
     
    I used an 80 grit sand paper to get such a coarse distressing. 
     
     
    See that cute detail on the side of the seat?
    More of that copperware spoon holder ... the holder part.


    Sharing with:
     
     
    Read More..

    MURALS door murals wall murals window sticker decals door posters ceiling murals Styrofoam Crown Moldings

    Rabu, 09 Maret 2016


    Bored with your bedroom door,  need more privacy on those windows, lifeless walls?
     no need to be  ......  as  there are quite a few options available to bring those doors, windows and walls and even ceilings to life .....with .....  indoor wall and ceiling  murals and outdoor wall murals.
    Visit Murals your way
     for a huge variety of murals to browse through 
     create a garden with a mural view
    Create a view when there is no view, create a window when there is no window, add depth to a boring wall. Change the entrace to your home. Add extra color to your garden, or bring the holiday feel while swimming in your home pool.
    Bring the tropical feel to your very own backyard pool.
    Boring spaces transformed  into wonderful views.
    Also visit the tropical beach theme section for more ideas on creating fake window views using murals.
    No windows  ....  no problem ....
    add a mural, frame it, and walla ..... now you have a window with a view
    also visit Windows - Walls - Doors - decorating ideas
    add depth to a flat wall with a scenic wall mural.
    also visit Creative Windows - Window Decorations Blog
    Enliven a blank wall with a doorway with a view
    Visit Murals your way  for a huge variety of murals to browse through
     
    decorate the ceiling with wall murals
    Decorate ceilings with
    wall decal stickers
    Another fun way to liven up walls accent with wall decals around mirrors and framed art

    Turn murals into pieces of artwork accented within panelsVisit Murals your wayfor a huge variety of murals to browse through
    Another fun decorating option ..... bring those boring doors to life ..... make the doors stand out, blend or make a statement. There are many color choices and pattern choices. Those doors will never be the same!
    variety of door murals and wall murals
    at your deco shop
    Pop Art Party door mural
    Needing privacy for your windows? Wanting a better view through the looking glass?
     

    Biscayne SeeThru Stained Glass Decorative Window Film 1
    Turn an unwanted view or plain window into an elegant focal point that enhances your home or office decor. The vinyl cling film is adhesive-free, easy to apply and easy to remove.
    Privacy window film provides privacy day and night, lights on or lights off.
    Visit Wallpaper for Windows

    to browse their extensive line of decorative etched glass, stained glass window films, frosted glass films, and privacy window film designs.

    Allure Etched Glass Sidelight Decorative Window Film
    Wisteria Window Film 1
    Now you can even decorate your shower screen doors!
    Rainbow
    shower decals at your deco shop
    Akropolis window mural
     at your deco shop
    Wall flats available from inhabit livingWall Flats are a modern embossed three-dimensional wall tile.
    Wall Flats™ from Inhabit® are lightweight dimensional wall tiles that work together through an automatic pattern repeat to create large-scale dimensional walls of any size and shape. Wall Flats work in multiples to create a continuous, uninterrupted sculptural wall.
    - variety of styles to choose from - 
    Bring those ceilings to life .......Ceiling and Wall TilesThese tiles can be used on walls and on ceilings.
    - tiles can be painted with any Water-Based Paint -
    • Beautiful Embossed 3D designs
    • Feather Light
    • Easy install (see the video on the left)
    • Adds Insulation
    • Sound Dampening
    • Cover popcorn ceiling
    • Hand Painted
    Decorative Ceiling Tiles offers nail-up tiles in three distinctive materials:
    Tin Coated Steel – these tiles are very similar to the tin ceiling tiles that have been in use for decades in homes of just about any architectural style. Tin tiles are the most budget-friendly of the three varieties of nail-up tiles, but they require painting from both sides to preserve their timeless beauty. Spray application is preferable due to the intricacies of most designs.
    Aluminum – nail-up aluminum ceiling tiles are available in a mill finish that can be painted at your home to match your room’s décor or choose one of the more than 75 prefinished colors that allow you to complete your ceiling in one easy step. Colors range from chocolate to emerald and just about anything you can imagine in-between. Aluminum tiles cost a little more than tin tiles, but are still priced to fit just about any budget.
    Copper – whether you’re after the appearance of aged elegance or casual comfort, it may be difficult to beat the look of Decorative Ceiling Tile’s copper and aged copper nail-up ceiling tiles. The tiles are solid copper and just like the tin and the aluminum tiles, are available in over 200 patterns that are sure to match almost any décor. Copper tiles are the most expensive of the nail-up varieties, but they’re still very affordable when remodeling an average sized room.
    So you have an ugly popcorn ceiling and are searching for ways to cover it up without having to scrape it because you know how messy that gets.  There are some other ways to cover a popcorn ceiling but if you are looking for the most affordable, easiest and fastest way to do so then Styrofoam Ceiling Tiles are the way to go.

    Styrofoam Crown Moldings

    • High quality (Made in Germany)
    • Light weight
    • Carved or plain
    • 6.5 foot long
    • Paintable
    • One person install
    • Glue up
    • Will not swell in contact with water
    • Indoor & Outdoor use
    • Photography Backdrops
      • Affordable
      • Light weight
      • Paintable
      • 100s to choose from
      • Can be mixed to create unique designs
      • 3D Textures
      • http://www.shareasale.com/r.cfm?B=221041&U=8143&M=26500&urllink=visit
        and browse through their huge seletion of

        Magic MuralsLots more wall mural - wall decals - wall letters - decorating ideas can be found here

    ------------------------------------------------------------------------------------------------------------------------------
    is copyrighted work by Maries Manor Kids Theme Bedrooms
    ------------------------------------------------------------------------------------------------------------------------------
    Read More..