


You dont have to use sand paper to give your furniture project a
distressed and worn look if you use Annie Sloan Chalk Paint.

This look can be achieved with a damp kitchen sponge.


Start by painting your project with your color choice of ASCP.
Once dry, grab a damp sponge and clean rag.
NOTE:
**2 sided sponge / scrubbies work best for this**
**just dampen your sponge do NOT have it dripping wet**
Working in small sections (like this leg) wipe your dried paint with the damp sponge.
The chalk paint is going to absorb the water and start to soften.
Now take the scrubby side and wiping over the same area.
Be gentle with this step, the softened areas will start to lift.
Take a rag and remove any excess paint haze and dry the area you just worked.
You are ready to wax now.
You can also take this opportunety to clean your floor.



 Read More..
Its really simple to do, no scrubbing, sanding, or dust,
you are letting the water do most of the work for you.
*****************************************
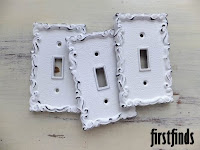
Stop in to see whats new in shabby chic white hardware available at firstfinds.
There are over 1000 pieces of used hardware to choose from
Etsy Shop.

TIPS FOR DISTRESSING primer red dresser
Selasa, 09 Februari 2016
A lot of ppl are nervous about how to distress, how much to distress, or even if they should distress.
The first questions is how ... there are many different methods and tools that you can use but the
simplest and easiest to understand is sand paper. When I sand I use 80 (course) 120 (medium) 220 (smoother).
**The following information applies to sanding ASCPs.**
220 (smoother) can smooth out a finish, remove drips, and do some light edge distressing.
120 (medium) removes paint quicker and in larger sections.
80 (course) is very aggressive and should be used with great caution.
The first place to sand is your edges, this defines the shape of your project.
Secondly consider where natural wear is, like hands always touching the drawer pull.
I distressed this piece to match an inspiration photo I have (source unknown). Be aware that too much
flat surface distressing is not desirable and always keep your sand paper moving in the direction
of the grain. Natural wear spots are made when the surface has been rubbed over time and in turn the wood grain shows. If you start crossing the grain with your sand paper it will look like a hack job.
Most electric sanders move in an orbital motion there fore I only hand sand when distressing with sand paper.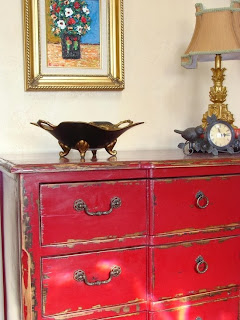

Read More..
Good luck with your next distressing project, be brave and bold but remember the rules.
SECRETS TO DISTRESSING white queen bedframe
Rabu, 27 Januari 2016
Distressing a paint finish successfully is an art. It isnt simply loading up a palm sander and attacking.
A light edge distressing is extremely attractive look and shows all the detail of your piece.
The more detailed the more it stands out in a crowd!
First lets talk sand paper ...
I hand sand all my distressing,
NO ELECTRIC SANDERS HERE!!!
I fold my paper over twice as shown in the photos.
To get into recessed areas I curve my paper as seen below.
Another trick is to highlight flaws.
When you come across something unusual in the finish like a knot or dent make it more noticeable.
See below how Ive sanded a little extra around the dent.
Distressing is meant to simulate age. Imagine the wear and tear furniture goes through in 50 years. Kids sitting rubbing their feet over the same rung of a chair as they grow up, or
Mom wiping down the cabinet doors during each week of house cleaning. The paint starts to wear
in the same areas over time.?

Read More..
I hope this will help you with your distressing projects and gives you some great ideas.
?
Langganan:
Postingan (Atom)