Tampilkan postingan dengan label bench. Tampilkan semua postingan

A SHIPPING THEMED GRAPHIC STORAGE BENCH

Sabtu, 21 Mei 2016


I find hand painting details very relaxing. I enjoy the quiet time inside my head.
And every now and then I go way over board painting a piece.
 
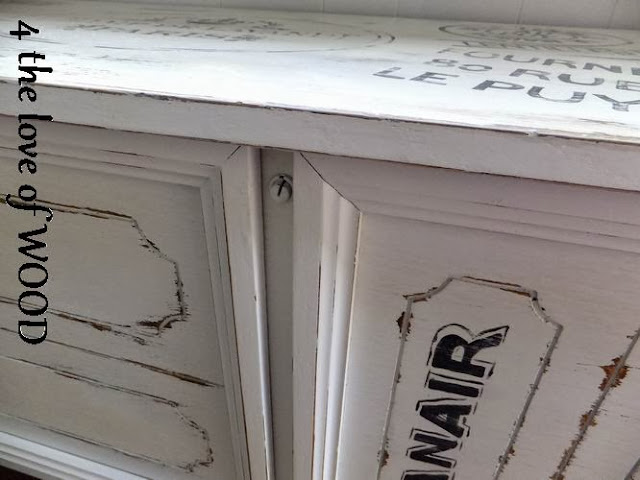
This storage bench is painted in a creamy white mix of AS Pure White and Old White. The graphics
 are all hand painted with black acrylic paint and a small artists brush. I`ve taken some photos of the
 steps I took to get the warn look over the letters and hope to share that with you soon.
I used a lot of symbols found on shipping envelops and crates.
 
If you come across a storage box like this look for the secret button that you push to unlatch the lid.
At first I thought it was locked, nope just push the button.?
 
 
Read More..

BENCH BUILT FROM A BED

Jumat, 29 April 2016


I spend a great deal of time and labour rebuilding fun and useful furniture from salvaged items
and sometimes the items wouldnt be possible without first being donated for a new purpose.


This amazing red bench originally was a donated headboard and footboard
from Carrie Thachuk owner of The Passionate Home.


It was a dark stained solid oak mission style bed her daughter had used at one time.
With the addition of some more salvaged wood, and several hours of painting and waxing
she is now the perfect entry / hall bench or dining bench as the back side is also finished.
 
I used:
2 seat boards & 4 cross struts for the ends 
base coat ASCP white, 2nd coat flat black spray paint, top color ASCP Emperors Silk
sanded with 120 grit, waxed and polished with Minwax paste finishing wax
 
 
The Passionate Home is about to celebrate their 7th year with a Birthday Flea Market right inside the store.
FYI, I stopped in for some paint yesterday and saw the amazing treasures being brought out.
This is one sale you do not want to miss,
I started making all sorts of funny noises with each different item I saw the chance to own.
 
Lots of ornate frames, a tall set of lockers, fancy glass wear, candle holders, orchard baskets, cheese box, wash stand cabinet, french provincial dining set with hutch, vintage baking pans, suit cases, local vintage life preserver, old typewriter and table, dental table, iron stone, 2 large vintage gates / doors, shutters, half a dozen shoe stretchers, beautiful china, science beakers, dress mannequin, lamps, antique brass candle sconces, Victorian oil lamps, DIY chairs, guilded mirrors, mason jar, misc silver trays and kitchen wares, tool caddies, antique irons, and more.
 
Congratulations Miss Carrie, not very many small business owners gets to celebrate 7 years.


Read More..

GRAPHIC TRANSFER STORAGE BENCH dog biscuit ephemera bench

Jumat, 22 April 2016


I finished painting a storage bench white and decided to add a graphic to it.
This bench could be used in an entry, in a kids room, or at the foot of a bed, therefore the graphic
had to work in all these locations. I spend hours searching for the one that would work and
I stopped when I found this Vintage Clip Art – French Dog Biscuit Ephemera at The Graphics Fairy.
 
 
I edited this graphic into 6 pages to fit over the front of the box.
I did it manually on a program I have but you can try this
online program http://www.greatis.com/utilities/posterit/
 
 
Picking the right image or font is always a challenge and can take hours or even days but getting it
right makes the piece come alive. So stick with it and keep looking. I have a cabinet I painted in
the spring and now is waiting in my back room for that perfect image. It is a period piece
from the early 50s and I know I want to find a Woolworths / Woodwards vertical advert to put right
up the middle face that makes the piece feel like it came right out of the store back in the day.
Like a haberdashery counter!
 
Cross your fingers I will find it and make it look amazing,
but back to the present days project and the BEFORE & AFTER
 
 
******************************** 
Today I have listed some vintage sheet music, castors, and coat hooks along with all the shabby chic hardware also available at Firstfinds Etsy Shop 


Read More..

A BED A BENCH AND A BIG BULB

Selasa, 29 Maret 2016


I love this new pretty and curvy bench I built. Every time I walk by it I smile.
 
 
The last bench I built I fell in love with too but I managed to find a place to keep that one. We have
never had a place to sit down in the mudroom until now, but now Im constantly sitting in there. 
Tips on how to build a bench using a bed frame can be read here:
http://blogspot.ca/2013/06/bench-buiding-tips.html
 
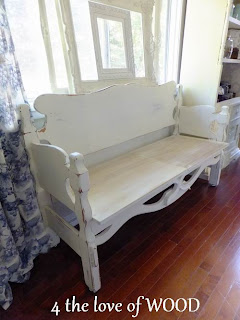
This curvy one is made with 2 headboards and 1 foot board. You can see the back and sides are made
 from a matching foot and head board but the front underside also has parts of a French provincial
 headboard. All three frames used to build this bench are made of solid maple, which is a wonderful
 hard wood and offers great stability in furniture making.
 
 
The seat is vintage pine boards salvaged from some local farm shelving. Pine is a soft wood.
Softwoods come from coniferous trees such as cedar, fir, and pine.
 
I also salvaged an antique milk glass floor lamp and cleaned it up, painted it, and rewired it.
The metal base has been spray in a snow white oil paint that matches the milk glass shade.
 
 
It has a tri light switch, meaning it has three different light brightness.
 
It also has an oversized socket and came with an over sized bulb.
 
And it also has a regular sized adapter for regular sized bulbs.
 
 
Read More..

BENCH BUIDING TIPS

Kamis, 04 Februari 2016


I learned long ago to focus negative energy on getting something wonderful accomplished
and thats how this new bench came to be built from a midcentury bed frame.
 
 
I use to build benches often back when I was doing my driftwood furniture
Its a bit different now when you are using a bedframe from the 50s vrs.
raw tree parts that have floated down the river.
 
 
This footboard measured 50" wide, divide that by half you get 25"
which is way to deep for bench arms.
So when you use a foot board for your bench sides you are going to loose a
good size piece in the middle as you can see below. 


I secured the sides into place with 4" screws.
 
 
Next I cut a 2" x 4" to be the front cross support.
 
 
Mark the height your cross piece needs to sit at and when you dont have
a helping hand you can use a pair of clamps to hold your board in place as you screw it in.


I added some decorative angles under the 2 x 4 for added strength.
 
This piece is being used in our Mudroom:
http://blogspot.ca/2013/08/mud-room-make-over.html
Read More..